
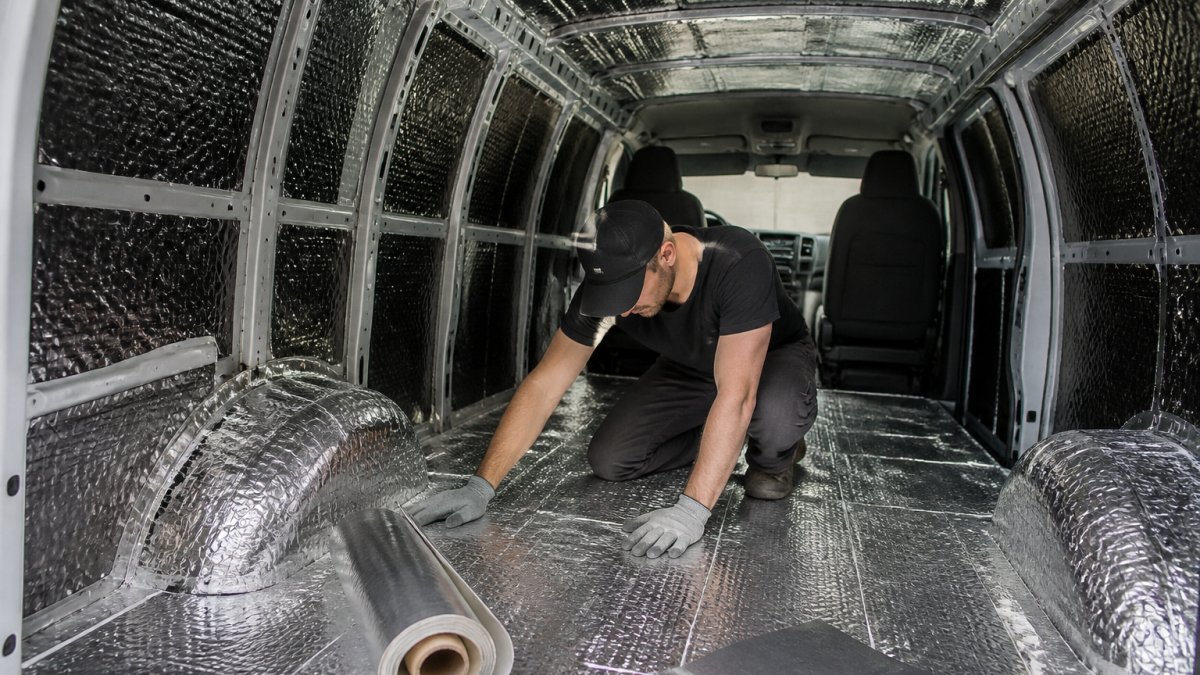
Table of Contents
- Is Custom Van Soundproofing Worth It? The Real Answer
- Van Soundproofing Cost: What You’ll Actually Pay
- Van Insulation vs Soundproofing: Two Jobs, Two Materials
- Best Sound Deadening Material for Vans: A Function-by-Function Comparison
- Van Road Noise Reduction: Which Panels to Treat First
- How to Install Van Sound Deadening: Step-by-Step
- Weight, Moisture, and Installation Risks to Weigh Before You Commit
- Conclusion: Matching the Upgrade to How You Use Your Van
- Frequently Asked Questions
Last Updated: October 15, 2026
Is Custom Van Soundproofing Worth It? The Real Answer
For most people who sleep, work, or log long highway hours in a van, custom van soundproofing is worth it: a quieter ride, less fatigue, and a cabin you can rest in, but only when you treat the right panels with the right materials.
At GOLF Cruiser, we’ve spent over 45 years building hand-built luxury vans.
Below: which treatments deliver the biggest gains, what each costs in money and weight, and how to decide if the upgrade fits your van use.
First, the part that changes everything: sound deadening and soundproofing are not the same job.
Each one needs a different material. Get the pairing wrong and you’ll spend money twice.
Van Soundproofing Cost: What You’ll Actually Pay
Van soundproofing cost depends on how much surface you cover, which materials you choose, and whether you do the work yourself. Here’s how the money breaks down.
Treat cost as a ladder, not a single price. Each rung buys a different amount of quiet:
- Entry level: doors and wheel arches only, the loudest zones, the cheapest win
- Mid level: doors, floor, and wheel arches, most of the perceived road-noise drop
- Full level: all panels plus roof and walls, the camper-comfort tier
What Drives the Number
Material is the biggest line item, driven by coverage area. Labor is the wild card: DIY saves the labor charge but costs you a weekend.
Three variables move your total more than anything else:
- Square footage treated. Wheel arches and doors might total 40-60 sq ft on a full-size van; a full shell including floor, walls, and roof can run several hundred sq ft. Material scales with that number, not the van’s sticker price.
- Material mix. Vibration-damping butyl mat is the volume material, with closed-cell foam and fiber layered over it. Mass-loaded vinyl is the most expensive per square foot and the heaviest.
- Who installs it. A shop charges for tear-down, surface prep, cutting, rolling, and reassembly, labor that can rival or exceed the material bill on a full build, because interior disassembly is slow, fiddly work.
DIY vs. Professional: Where the Money Goes
DIY costs materials plus consumables (degreaser, rags, blades, roller); professional builds add skilled labor and shop overhead.
Material is predictable; labor is the variable. That’s why two quotes for the “same” job can differ sharply, one shop may quote a partial treatment with thin coverage, the other a full shell with a foam layer.
Ask any builder for a per-square-foot material breakdown before you approve a quote. A quote that only gives a lump sum hides where your money is going, and it makes it impossible to compare options fairly. Ask specifically: how many square feet, which materials, and how many layers.
How to Judge Whether the Spend Is Worth It
The honest test isn’t the total, it’s the cost per unit of quiet. Wheel arches and doors deliver the largest perceived drop in road noise for the least material, since they sit closest to the tires and road.
If you drive daily but rarely sleep in the van, the entry and mid tiers pay back fastest; if it’s your camper, the full tier is where the comfort return lives.
Van Insulation vs Soundproofing: Two Jobs, Two Materials
Van insulation and soundproofing solve different problems with different materials. Insulation manages heat; soundproofing manages noise. A product that does one well often does the other poorly.
Here’s the split that matters:
- Thermal insulation slows heat transfer, keeping the cabin warm in winter and cooler in summer
- Sound deadening stops metal panels from vibrating and radiating noise
- Sound absorption reduces echo and reflected noise inside the cabin
The confusion costs money. People buy thick foam expecting a quiet ride, then wonder why road noise barely changes. Foam absorbs sound inside the cabin; it does not stop vibration in the floor pan.
You need both, in the right places.
Best Sound Deadening Material for Vans: A Function-by-Function Comparison
The best sound deadening material for vans depends on the job. Butyl mats handle vibration. Closed-cell foam and fiber handle absorption and thermal control. No single product does everything well.
Here’s how the main options compare by function:
| Material | Primary Job | Best Placement | Watch Out For |
|---|---|---|---|
| Butyl mat | Vibration damping | Floor, doors, wheel arches | Added weight |
| Closed-cell foam | Absorption and thermal | Walls, roof, behind panels | Poor vibration control |
| Fiber insulation | Thermal and absorption | Walls, roof cavities | Moisture if wet |
| Mass-loaded vinyl | Sound blocking | Floor over mat | Heavy, higher cost |
Butyl Mats: Vibration Damping for Metal Panels
Butyl mats are the workhorse of van sound deadening: they bond to bare metal and add mass, stopping panels from vibrating and turning road noise into cabin noise.
Apply them to floor panels, door skins, and wheel arches first, those flex and drum the most.
The trade-off is weight: butyl is dense, and covering a full van floor adds real pounds that matter for payload and fuel economy.
Closed-Cell Foam and Fiber: Sound Absorption and Thermal Control
Closed-cell foam and fiber insulation handle the second half: they soak up sound bouncing around the cabin and slow heat transfer through walls and roof.
Closed-cell foam resists moisture, making it the safer pick in damp areas. Fiber performs well thermally but needs protection from water, wet fiber traps moisture against metal.
Use these over the butyl layer, not instead of it.
Van Road Noise Reduction: Which Panels to Treat First
Van road noise reduction works best when you treat panels in order of impact: doors, floor, and wheel arches first, roof and walls second, the biggest quiet-per-dollar gain.
If you only treat one zone, treat the wheel arches. They sit directly over the tires and transmit tire noise straight into the shell.
Doors, Floor, and Wheel Arches: The High-Impact Zones
Doors, floor, and wheel arches are the high-impact zones because they’re closest to the noise sources. Tire noise, road rumble, and engine vibration all enter here first.
Treat them in this order:
- Wheel arches: butyl mat plus a foam layer
- Floor: full butyl coverage, then foam over the top
- Doors: butyl on the outer skin, foam on the inner panel
This trio delivers most of the perceived quiet. Everything else is refinement.
Roof and Walls: Comfort for Sleeping and Living
Roof and walls matter most for sleeping and living comfort. They won’t stop much road noise alone, but they cut echo and help with temperature control.
For a camper van, this is where thermal insulation and sound absorption overlap.
If you sleep in the van, this step is not optional. A bare metal roof radiates heat out at night and turns rain into a drum solo.
Skipping the roof and walls is the mistake most DIY builders make. They quiet the road noise, then can’t sleep because every raindrop sounds like a hammer. The cabin also swings between too hot and too cold.
How to Install Van Sound Deadening: Step-by-Step
Total time: one to two weekends, depending on coverage
Difficulty: moderate
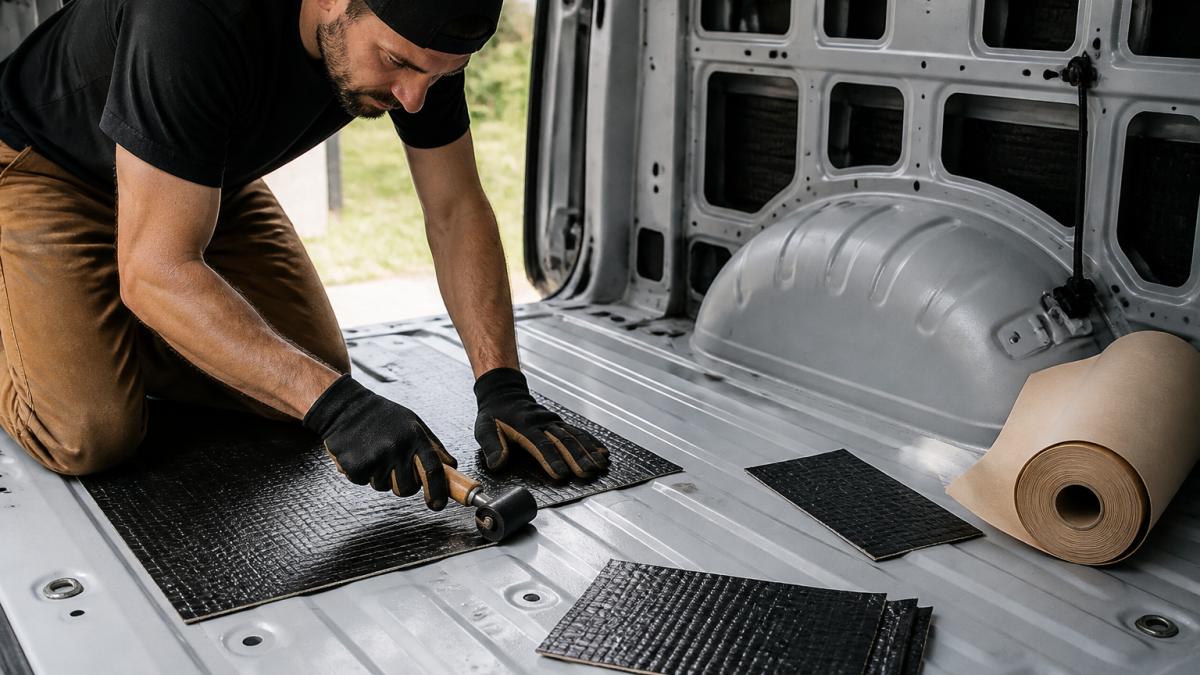
What you’ll need:
- Butyl sound deadening mat
- Closed-cell foam or fiber insulation
- Roller tool
Step 1: Strip the interior. Remove seats, trim, and panels to expose bare metal.
Step 2: Clean and degrease. Wipe every panel with degreaser and let it dry.
Step 4: Roll it down. Press the mat firmly and roll it with the roller tool.
Step 6: Reassemble. Reinstall panels and trim.
Expected result: a noticeably quieter cabin and better temperature control.
Weight, Moisture, and Installation Risks to Weigh Before You Commit
Weight, moisture, and installation risks decide whether your upgrade holds up. Ignore them and a quiet van becomes a rusty, sluggish one.
Weight and Payload: The Trade-Off Nobody Quantifies
Butyl mat is dense, and density is the point, it damps vibration by adding mass.
Every van has a gross vehicle weight rating (GVWR) and a payload figure, the difference between curb weight and what you’re allowed to load.
A practical way to plan it:
- Entry level (doors and wheel arches): the lightest tier, a modest addition you’re unlikely to notice in daily driving.
- Mid level (doors, floor, wheel arches): the weight climbs because the floor is a large, flat area and butyl is heavy per square foot.
- Full level (all panels plus roof and walls): the heaviest tier, and the one most likely to matter if you’re already near your payload limit with a full camper build.
What does the weight cost in practice? Payload headroom, if you’re close to GVWR, added material eats the margin you need for gear and passengers.
Weigh your material before you install it. If the total pushes you near your payload limit, drop the lowest-value coverage first, usually roof and wall mass on a van you don’t sleep in.
Moisture and Corrosion: The Long-Term Risk
Moisture is the bigger long-term risk, working through trapped water and condensation.
Trapped water happens when a moisture-holding material, fiber insulation, open-cell foam, sits against bare metal and gets wet. Water against steel starts corrosion; if the material stays wet, rust takes hold under a layer you can’t see.
Condensation happens when warm, humid cabin air meets a cold metal panel. The panel sweats, and if that moisture can’t drain or dry, it pools behind your insulation.
How to reduce the risk:
- Use closed-cell foam in damp areas, it resists water uptake, unlike fiber.
- Keep fiber insulation out of cavities where it can get wet and stay wet.
- Leave drain paths open so water that does enter can escape.
Installation Risk Comes Down to Prep
Butyl applied over dust, oil, or moisture peels, and peeling material does nothing, you’ve paid for weight with no quiet. Degrease, dry, and roll every panel so the adhesive bonds fully and air pockets are gone.
The other common mistake is compressing foam or fiber. They absorb sound and slow heat transfer because of their structure; crush them and you lose the performance you paid for. Fit them, don’t squash them.
Skipping prep is the most expensive shortcut in a van build. Material that peels off in a year means tearing the interior apart twice, once to install it wrong, once to redo it. Clean, dry, and roll every panel the first time.
Get weight, moisture, and prep right and the upgrade lasts the life of the van. Get them wrong and you’ve added cost, mass, and rust to a vehicle you were trying to improve.
Conclusion: Matching the Upgrade to How You Use Your Van
Custom van soundproofing is worth it when your van is more than a way from A to B.
Match the upgrade to your use: treat high-impact zones first, add roof and wall insulation for sleeping comfort, and respect the weight and moisture trade-offs.
That’s exactly how we approach it at GOLF Cruiser.
Get started with GOLF Cruiser and arrive at the course rested, organized, and ready to play.
Frequently Asked Questions
Is soundproofing a van worth the cost?
It depends on how much you drive and how much noise bothers you. Partial coverage on doors and wheel arches delivers the biggest perceived improvement for the lowest spend. Full coverage costs more and adds weight, but pays off for frequent long-haul drivers. If you only use the van a few weekends a year, a targeted partial treatment is usually the better value.
How much does it cost to soundproof a van?
Van soundproofing cost varies widely by coverage level and material. A partial treatment using butyl mats on doors and wheel arches is the lowest-cost entry point. Full coverage across floor, walls, roof, and arches costs significantly more in materials and labor. DIY installation cuts labor costs but takes a full weekend or more. Request a quote for your specific van and coverage plan.
Does van soundproofing reduce road and tire noise?
Yes, when applied to the right panels. Wheel arches and floor panels transmit most tire and road noise into the cabin. Butyl mats on these areas damp vibration, while closed-cell foam absorbs remaining airborne noise. Treating doors and the roof addresses wind and engine noise. Combining materials by function produces better van road noise reduction than any single product alone.
Does soundproofing add much weight to a van?
Yes, and it matters for payload and fuel economy. Butyl mats are the heaviest component, and full coverage across a large van can add substantial weight. Partial coverage keeps the addition modest. If you are near your van’s payload limit or track fuel costs closely, calculate material weight before committing to full coverage and prioritize high-impact zones instead.